Tampilkan postingan dengan label color. Tampilkan semua postingan
Tampilkan postingan dengan label color. Tampilkan semua postingan
Selasa, 12 Agustus 2014

Jumat, 31 Januari 2014
VFX bTrace Color Blender
Such a neat add-on that traces any kind of type of objects has a lot more to offer than it may seem.
Rabu, 02 Oktober 2013
Color Code Generator

You can get this tool from here
Minggu, 29 September 2013
How to Add Different Background Color or Image in Each Blogger Post
When you have multiple authors on a blog and want to make a specific post stand-out, then you can change your posts background color or place a background image behind them, each time is needed. Therefore, this tutorial will show you how to style each post differently by adding some codes in your Blogger posts. (this wont take effect if you have the read more function enabled on your blog)

How to Change the Color of the Post Background
When you create a post, switch to HTML, near the Compose tab and add the following code just at the beginning and at the end of your post content.
Its done by wrapping your Post content into a "div" element. You can apply this setting anytime to your already published posts as well or you can change/remove it later.

How to Add a Background Image in a Blogger Post
Add the following code just at the beginning and end of your post content.
Now click Publish and you are done.
Read More..

How to Change the Color of the Post Background
When you create a post, switch to HTML, near the Compose tab and add the following code just at the beginning and at the end of your post content.
<div style="background-color: #DCC368; padding: 5px 8px 5px 8px;">
Your text goes here...</div>
- add the red line at the BEGINNING of your post.
- add the div tag in blue at the END of your post.
- replace the part in green with your own color (search for colors hex value)
- "Your text here...." is where the Post content goes
Its done by wrapping your Post content into a "div" element. You can apply this setting anytime to your already published posts as well or you can change/remove it later.
Heres the example of the placed code in the Post Edit box:

How to Add a Background Image in a Blogger Post
Add the following code just at the beginning and end of your post content.
<div style="background-image: url(IMAGE-URL-HERE); background-repeat: no-repeat; ">
Your text goes here...</div>
- in green, you need to paste the URL address of your hosted picture (use Photobucket, Tinypic etc.)
- the red line has to be added at the beginning of your post.
- the blue part has to be added where your post ends.
- "Your text here...." is where your Post content should be
Now click Publish and you are done.
Sabtu, 07 September 2013
How to Customize Blogger Comments By Adding a Background Color and Border
The comments are an essential part of a blog because in them is reflected the readers opinions regarding a post or our blog, so it is important to spend a little of our time to make this part looking more presentable, accessible and neat.
To set in order our comments, it is necessary to make each comment easy to identify, therefore to know from where it begins and to where it ends, otherwise it becomes a jumble of letters of which the reader can run away. Here are some ways to make some order by separating each comment.
- Add a Separator To Blogger Comments
- Add a Divider Below Comments in Blogger
- Fully Customize Your Blogger Comments By Changing The Background Color and Border
 The first method is the easiest, and is about how to put a border below our comments, this is to separate each blog comment in a simple but effective way.

Step 1. To add a simple separator go to Template > Edit HTML and click on the small arrow on the left of <b:skin>...</b:skin>
 Step 2. Click anywhere inside the code area and search using CTRL + F keys, for the following piece of code:

Step 3. Paste the following style just above it:
- If we are using threaded comments (with the reply option):
- If we are using previous commenting system (with no reply option)
Note: To change the borders color, replace the bolded color value and to change its thickness, increase/decrease the 1 value.
Step 4. Save the Template.
Instead of a simple border, we can also add a divider/image between our comments.

Step 1. Go to Template > Edit HTML and search (CTRL + F) for the following piece of code:

Step 2. Paste the following just above it:
- If we are using threaded comments (with the reply option):
- If we are using previous commenting system (with no reply function)
Note: The URL that is in blue represents the image that you can change as you like, just remember that at the height must set the height of an image with 30px more, for instance, if the images height is 50px then the value will be 80px. This is for making sure that the image wont overlap the date of comments. (for threaded comments, increase/decrease the padding 30 value)
Step 3. Save the Template.
But you can still have more styles for each comment, for example adding a background color and a border.
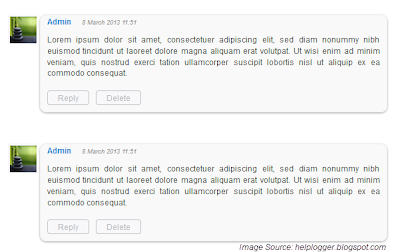 Step 1. Go to Template > Edit HTML and search for the following piece of code:
Step 2. Paste the following just above it:
- If we are using threaded comments (with the reply option):
Step 3. Save the Template.
- If we are using previous commenting system (with no reply function):
Step 1. Search for this line in your template:
Step 2. Then, add the following code just below of it:
Step 3. Look a little further down and youll see the </b:loop> code and just above it, add this:
Step 4. Now find this:
Step 5. And just above of it, add this CSS code:
In either case, you can change the background color, border, etc.. in parts with annotations in green.
Step 6. Save the Template.
If you need more help, leave a comment below.
Read More..
To set in order our comments, it is necessary to make each comment easy to identify, therefore to know from where it begins and to where it ends, otherwise it becomes a jumble of letters of which the reader can run away. Here are some ways to make some order by separating each comment.
- Add a Separator To Blogger Comments
- Add a Divider Below Comments in Blogger
- Fully Customize Your Blogger Comments By Changing The Background Color and Border
How to Add a Separator/Border To Blogger Comments

Step 1. To add a simple separator go to Template > Edit HTML and click on the small arrow on the left of <b:skin>...</b:skin>

]]></b:skin>

Step 3. Paste the following style just above it:
- If we are using threaded comments (with the reply option):
.comment-block {
border-bottom: 1px solid #000000;
}
.comments .continue {
border-top: 0px solid $(widget.alternate.text.color);
}
- If we are using previous commenting system (with no reply option)
#comments-block .comment-footer {
border-bottom:1px solid #000000;
}
Note: To change the borders color, replace the bolded color value and to change its thickness, increase/decrease the 1 value.
Step 4. Save the Template.
Instead of a simple border, we can also add a divider/image between our comments.
How to Add a Divider (Image) Between Each Comment in Blogger

Step 1. Go to Template > Edit HTML and search (CTRL + F) for the following piece of code:
]]></b:skin>
Screenshot:

Step 2. Paste the following just above it:
- If we are using threaded comments (with the reply option):
.comment-block {
background-image:url(https://blogger.googleusercontent.com/img/b/R29vZ2xl/AVvXsEhpuRPyiCv8M4ZdxLaVH4zOU1vAhtdjvC_Rf76uheg57D8jiDG5RdUFH5Iz7gvZoRfanoqdCg2TctTWI_SexQDWGAcsJjtZcBkglAlQbEiSsGaQHtRMVpW7zGCHKTDYYTu3fPosjAMVYlJQ/s1600/74.gif);
background-repeat:no-repeat;
background-position:center bottom;
padding-bottom:30px;
margin-top: -10px;
}
.comments .continue {
border-top: 0px solid $(widget.alternate.text.color);
}
- If we are using previous commenting system (with no reply function)
#comments-block .comment-footer {
background-image:url(https://blogger.googleusercontent.com/img/b/R29vZ2xl/AVvXsEhpuRPyiCv8M4ZdxLaVH4zOU1vAhtdjvC_Rf76uheg57D8jiDG5RdUFH5Iz7gvZoRfanoqdCg2TctTWI_SexQDWGAcsJjtZcBkglAlQbEiSsGaQHtRMVpW7zGCHKTDYYTu3fPosjAMVYlJQ/s1600/74.gif);
background-repeat:no-repeat;
background-position:center bottom;
height: 50px;
}
Note: The URL that is in blue represents the image that you can change as you like, just remember that at the height must set the height of an image with 30px more, for instance, if the images height is 50px then the value will be 80px. This is for making sure that the image wont overlap the date of comments. (for threaded comments, increase/decrease the padding 30 value)
Step 3. Save the Template.
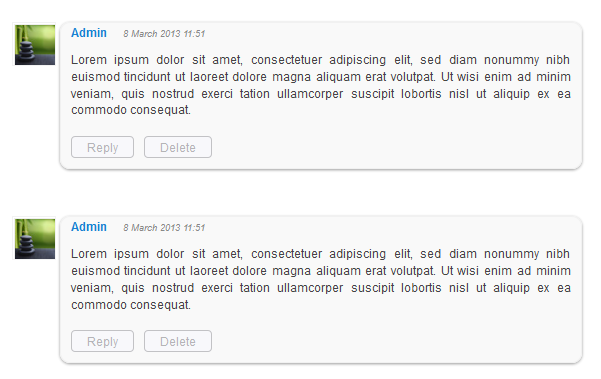
But you can still have more styles for each comment, for example adding a background color and a border.
How to Add A Border and A Background Color To Blogger Comments

]]></b:skin>
Step 2. Paste the following just above it:
- If we are using threaded comments (with the reply option):
.comment-block {
background:#F9F9F9; /* Background Color */
border: 1px solid #f1f1f1; /* Border style */
margin-bottom:20px;
-webkit-box-shadow: 0 1px 2px rgba(0, 0, 0, .4);
-moz-box-shadow: 0 1px 2px rgba(0, 0, 0, .4);
box-shadow: 0 1px 2px rgba(0, 0, 0, .4);
-moz-border-radius: 10px;
-webkit-border-radius: 10px;
border-radius: 10px;
}
.comments .comment-thread.inline-thread {
background-color: #FAFAFA; /* Background color behind the replies */
border-left: 4px dotted #E6E6E6; /* Border on the left side of replies */
}
.comment-content {
padding:2px 10px 10px 10px;
color:#444444; /* Font Color in Comments */
}
.datetime a {
font-style:italic;
font-size:9px;
margin-left: 2px;
}
.comments .comments-content .user a{
color:#1982D1; /* Authors name color */
font-size: 12px; /* Authors name size */
padding-left: 10px;
font-weight:bold;
text-decoration:none;
}
.comments .comment .comment-actions a,.comments .comment .continue a{
display:inline-block;
margin:0 0 10px 10px;
padding:0 15px;
color:#B4B4B7;
text-align:center;
text-decoration:none;
background:#F8F8FB;
border:1px solid #C2C2C5;
border-radius:4px;
height:20px;
line-height:20px;
font-weight:normal;
cursor:pointer;
}
.comments .continue {
border-top: 0px solid $(widget.alternate.text.color);
}
.comments .comments-content .icon.blog-author {
background-image: none;
margin-left: -10px;
}
.comments .avatar-image-container{
margin: 0px 0px 0px 0px;
padding: 0px 0px 0px 0px;
width: 40px;
max-height: 40px;
border: 1px solid #F2F2F2;
padding: 1px;
}
.comments .avatar-image-container img{
margin: 0px 0px 0px 0px;
padding: 0px 0px 0px 0px;
max-width: 40px;
height: 40px;
}
Step 3. Save the Template.
- If we are using previous commenting system (with no reply function):
Step 1. Search for this line in your template:
<b:loop values=data:post.comments var=comment>
Step 2. Then, add the following code just below of it:
<div class=comments-ct>
Step 3. Look a little further down and youll see the </b:loop> code and just above it, add this:
</div>
Step 4. Now find this:
]]></b:skin>
Step 5. And just above of it, add this CSS code:
.comments-ct{(The rounded edges will not work in Internet Explorer with CSS)
background:#F9F9F9; /* Background Color */
border: 1px solid #f1f1f1; /* Bprder Style */
margin-bottom:20px;
-webkit-box-shadow: 0 1px 2px rgba(0, 0, 0, .4);
-moz-box-shadow: 0 1px 2px rgba(0, 0, 0, .4);
box-shadow: 0 1px 2px rgba(0, 0, 0, .4);
-moz-border-radius: 10px;
-webkit-border-radius: 10px;
border-radius: 10px;
}
.comment-body {
color:#444444; /* Font Color in Comments */
padding:10px;
}
.comments-ct a {
padding-left: 5px; /* Link color */
color: #4A9BD8;
}
.comment-timestamp a {
font-style:italic;
font-size:9px;
padding-right:10px;
padding-left:10px;
}
In either case, you can change the background color, border, etc.. in parts with annotations in green.
Step 6. Save the Template.
If you need more help, leave a comment below.


